Technical Guide
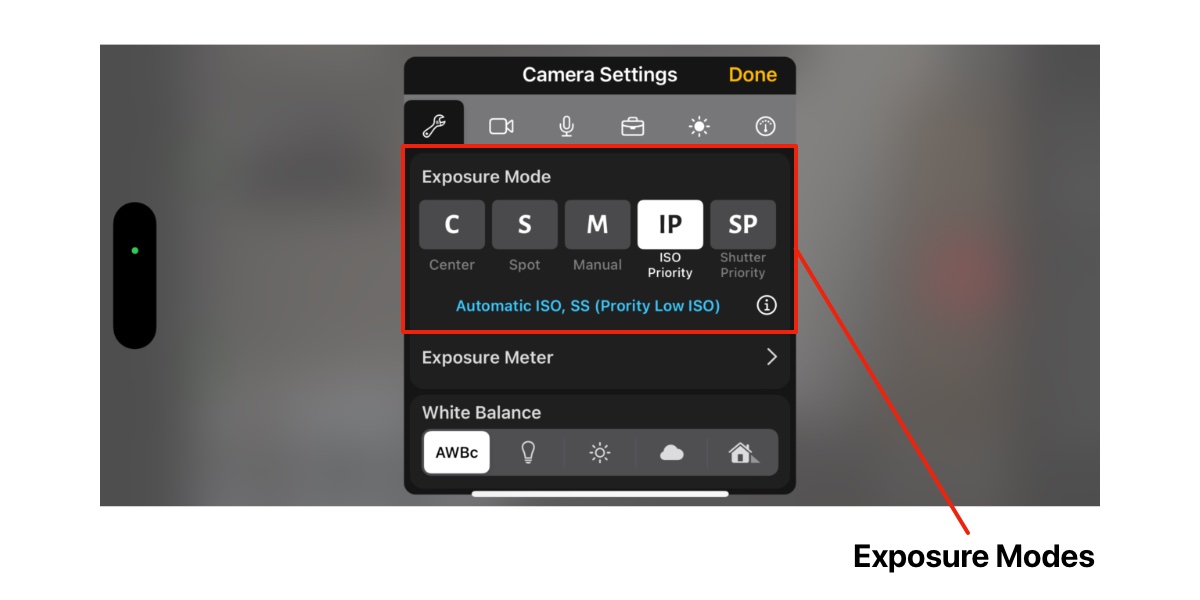
Exposure Modes and Exposure Meter
This guide explains how to use the Exposure Modes and Exposure Meter available in Cinema P3 Pro Camera.
In particular, it provides information about the ISO Priority and Shutter Priority exposure modes that are available
when using the 'Video' and 'Creative Modes'.
Contents
1 Exposure Modes
1.1 Introduction
1.2 Center and Spot
1.3 Manual
1.4 ISO Priority
1.5 Shutter Priority
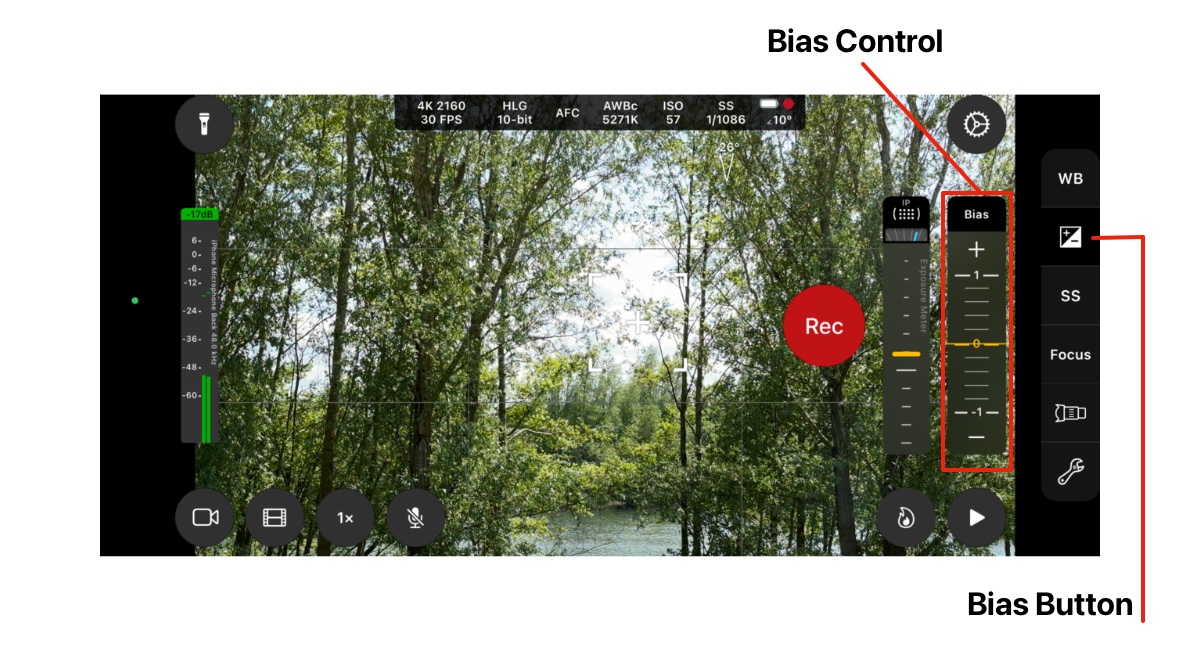
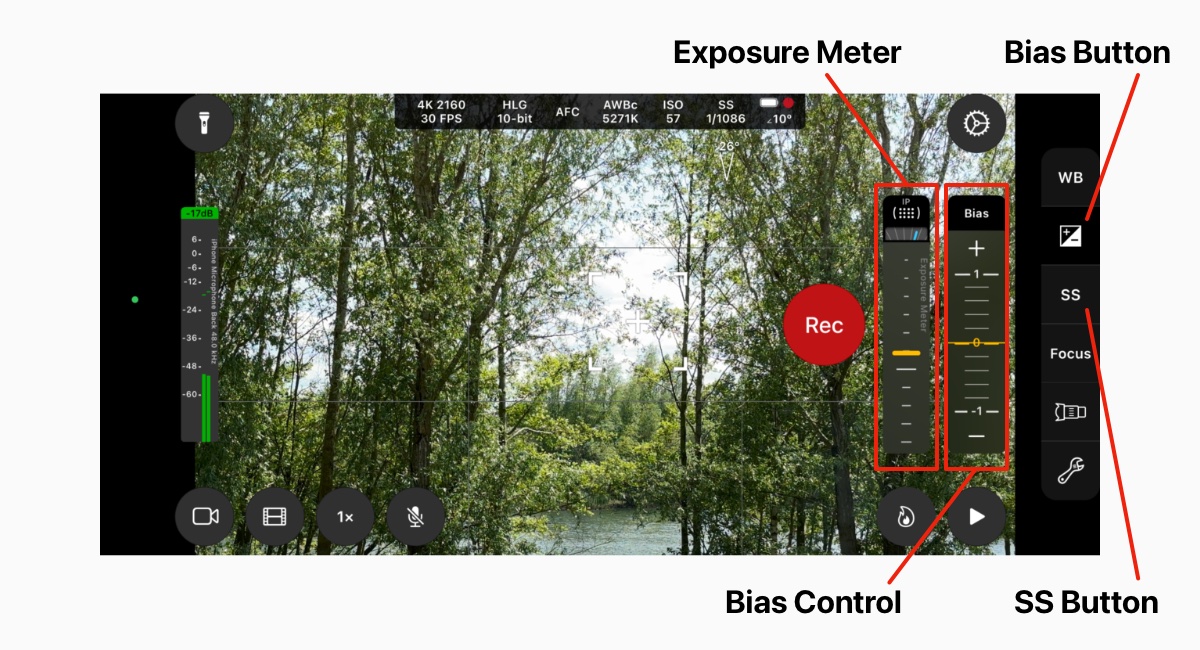
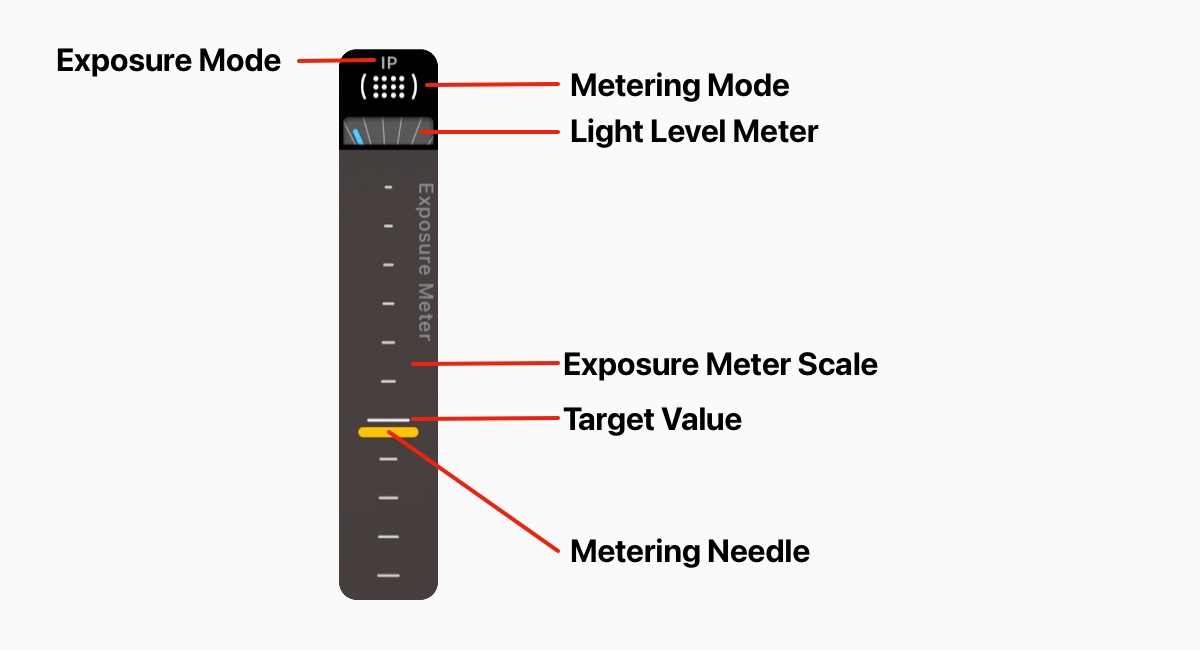
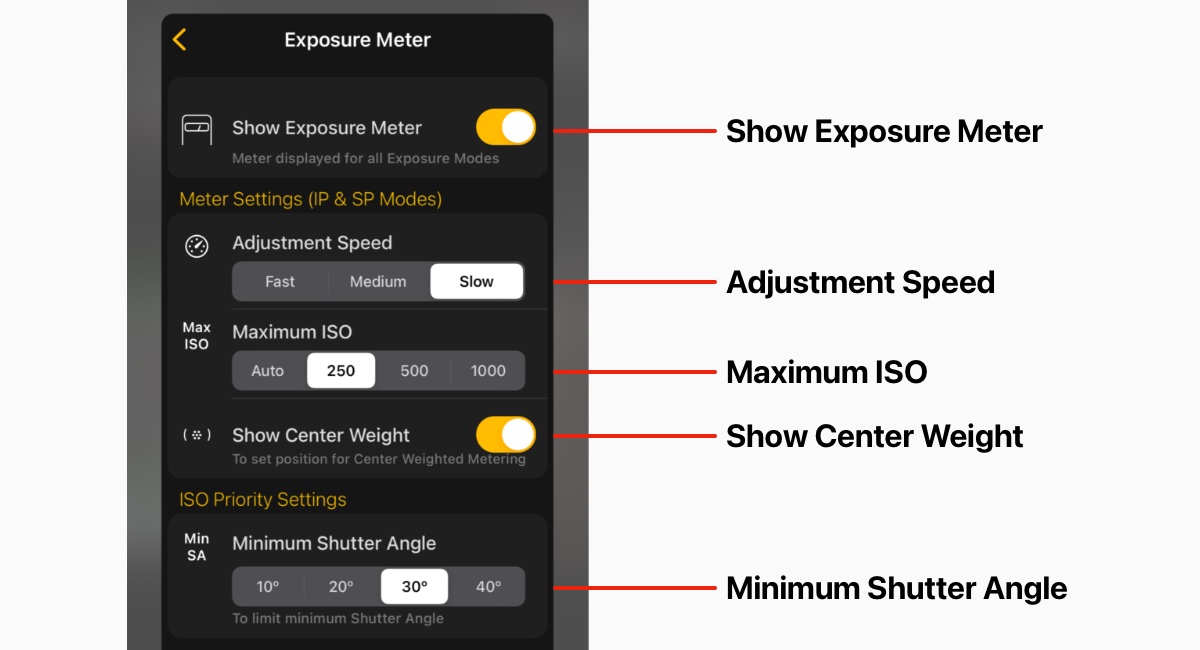
2 The Exposure Meter
2.1 Description
2.2 Key Elements
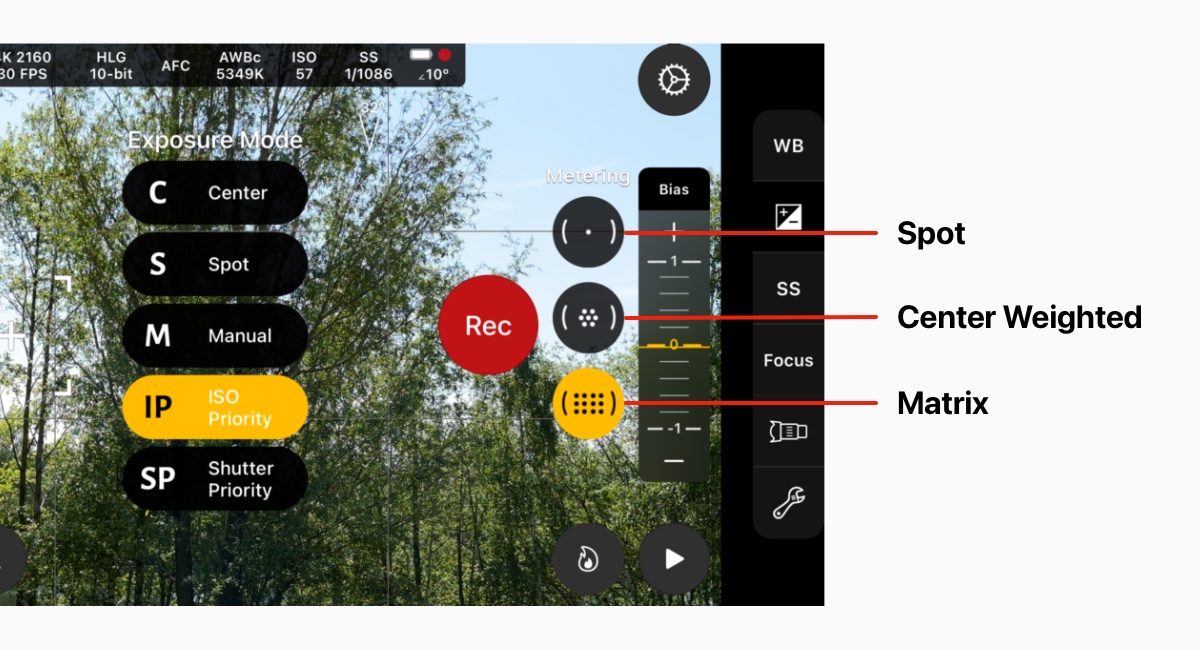
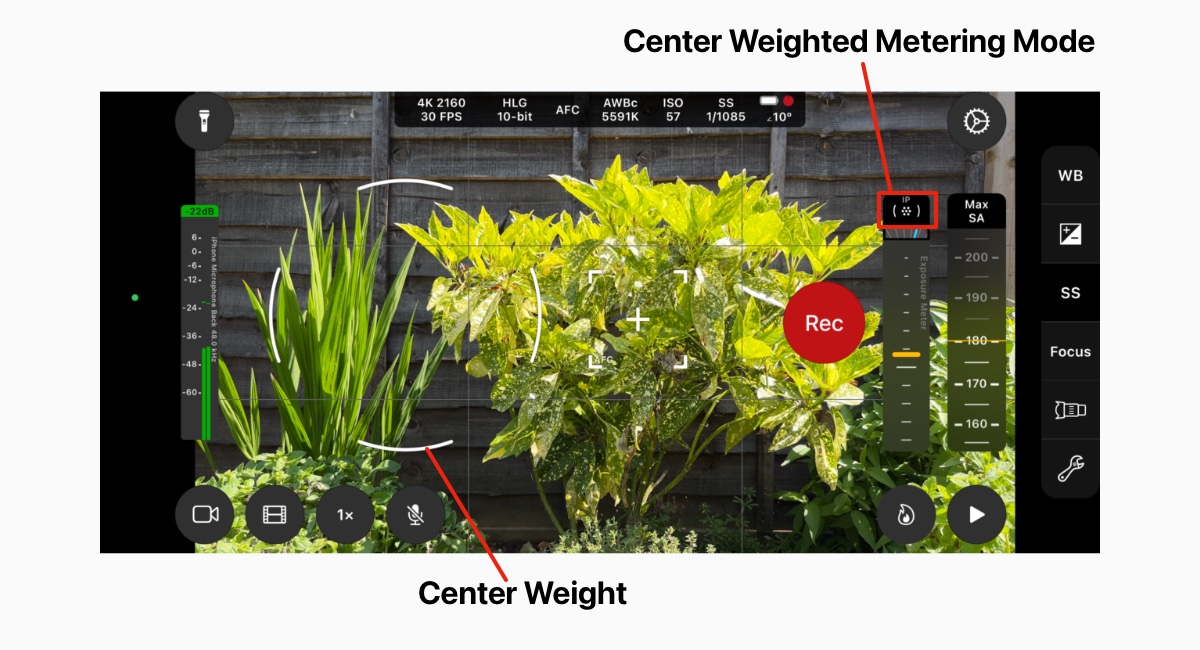
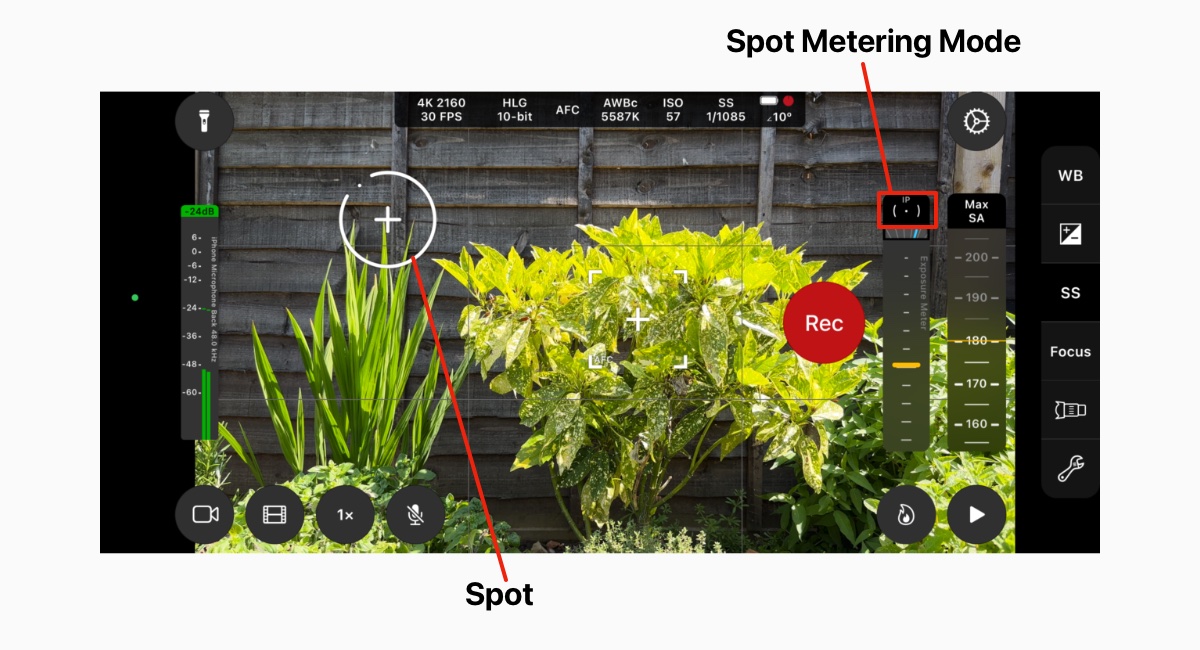
2.3 Metering Modes
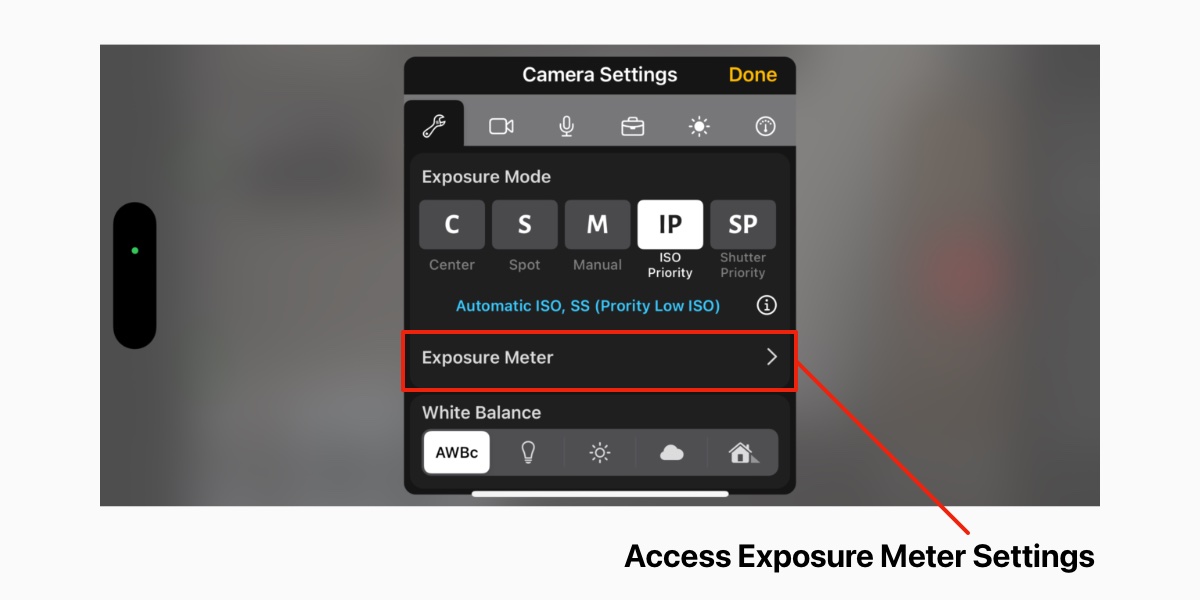
2.4 Exposure Meter Settings